When we do a Move command in Revit, on the Option Bar there is an option for Disjoin. this option stays as it was set for every Move and even stays set from session-to-session.
When Move is done with Disjoin, it is as if we’d copied the selected element(s) and the deleted the original selection. This is sometimes very useful, especially when Revit has set up some association (especially with walls) that is affecting other elements that we don’t want to move.
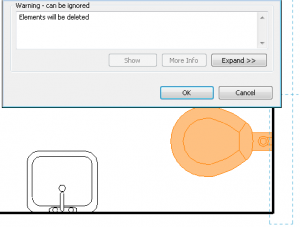
On the other hand, when elements are moved with Disjoin, most associated elements are deleted. This includes dimensions, tags, keynotes, etc. “Based” families are also deleted, with the exception of Wall-based Doors & Windows (there may be others). One will get this warning if something is about to be deleted because of the Move:
Be aware and do not blithely select OK. “Can be ignored” — yeah, if you don’t mind perhaps destroying thousands of dollars of work.
Most importantly, never move a Level with Disjoin without really thinking about the implications. The views and anything else associated with that Level will also be deleted. That could be really bad. Also in a worksharing situation, there may be no Undo after that’s happened. If you find yourself in that situation, consider not Synchronizing, discarding your session, and making a new Local.
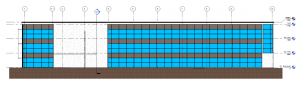
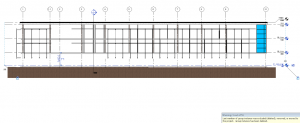
Here is the “Advanced Sample Project” before, and after, moving “01 – Entry Level” with Disjoin on:
So, when doing Move in Revit, I suggest always looking up on the screen and checking the status of the Disjoin option.


Another informative Revit tutorials. Keep it coming. It is a huge help for beginners like me.